More ORC posts this week. Check out the grasscloth post from earlier this week here.
The husband is now getting in the ORC spirit. Remember our hamper drawer from our IKEA Pax hack? Well the plan was always to cover it with a fake door front. We get a lot of requests for a 'how to' on building the doors so I'll use the build of this door to show the general concept. You would need to adjust the plans depending on your size/design needs. It takes a LOT of patience and precise measuring. I don't have either of those skills so this was a project for the engineer husband.
You could probably just use a flat sheet of wood and glue/nail the wood stiles right on top of it but if you're building a large door it would be prone to warping. Our doors are tongue and groove so that all the pieces fit together like a puzzle. This allows for expansion and contractions across the seasons which minimizes warping. Here was our plan:
We used 1x4" birch boards and 1/4" sheets of finished plywood to build our doors. The wood sat inside for a week or so to acclimate to the house. Using a 1/4" router bit Sean put the grooves in the wood. This is what the wood sheets will slide into.

That became this:
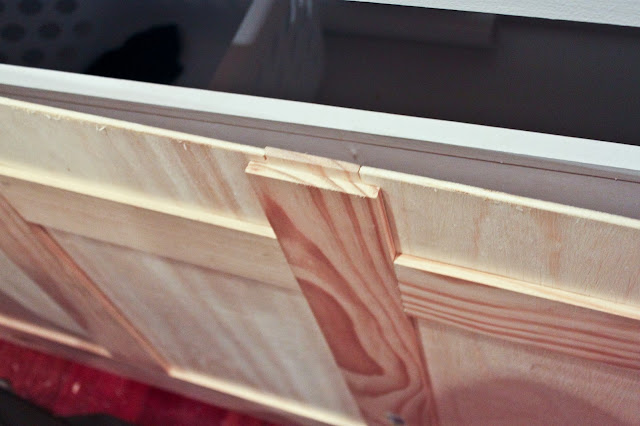
Once all the pieces were cut he dry fit it against the hamper drawer to see that it completely covered the drawer and while ensuring the doors on either side still opened. You can see how the pieces slide together here.
We used the very scientific approach of using a level and a Dinosaur Dig book to determine spacing off the floor to line up against the already installed doors.
There were many helping hands.
Before you glue, as you're assembling, stick a small square of window insulation at each corner of the plywood sheets. The insulation will give the wood freedom to expand and contract without the wood rattling around as it is moved. Next up, glue. Run a bead of wood glue on the rails and stiles only. Important - do NOT glue the plywood. That should remain floating to allow the wood to expand and contract with the seasons. Wipe up any glue drips quickly. Clamp tight and then let dry for 24 hours on a flat surface.
Next up - sanding, prime & paint! Lightly sand for smooth finish. 1 coat of primer and 2 coats of paint. We used Benjamin Moore Decorators White.
Head over to Calling It Home to see the progress of the other participants!


