Sunday, November 15, 2015

One Room Challenge: Room 2, Week 6

Well we didn't finish either room in 6 weeks but at least we're close.  The family room is done but the couch won't be delivered for another couple of weeks.  Probably a blessing in disguise considering my house is covered in a layer of fine spackle dust.  Each time I type 'spackle' my computer wants to autocorrect to 'sparkle.'  Makes me giggle each time. 


I was able to remove the above wall paper in under 20 minutes but unfortunately the walls beneath it were already on its last legs and basically only held up by the dozen or so coats of paint I've put on them.  So we ripped everything down.  


The bad news is that it set us back a week.  The good news is that we were able to upgrade everything in the room (add a fan and an outlet, fix some old wiring, add a new light fixture, etc.).  There is not a single thing from the original room that was kept.  Even the subfloor went.

New drywall was hung, followed by mud, sand repeat for about a week.   I painted the top half of the wall using some leftover Revere Pewter.  


The bottom half gets all the leftover bead board from the porch project that I never showed you the final product on (b/c we honestly never finished it!  Maybe next year).


Sean swapped the ugly dental crown molding with the molding that matches the rest of our house and it was painted out with Benjamin Moore Acadia White.


And now I'm currently in this cycle.  Prime, wall paint, trim paint, ceiling paint.


Of all the places this dog could choose to sleep he chooses the 3'x5' construction zone.  I think we picked the perfect dog for our family.


 I'm hoping one more week and then we can call this room done.  Check out the other participants here (hopefully they're not still painting!).

Saturday, October 31, 2015

One Room Challenge - Week 4, Room #2

It feels like we've been talking about this 3x5' floor forever right?  I feel ya.

We painstakingly measured and remeasured and remeasured.


Then finally we laid all the tile.


With the help of a 4 legged supervisor.


Done!  The grout looks pretty white now but it will (IT HAS TO!) dry gray.  


Check out the other ORC participants here.

Friday, October 23, 2015

One Room Challenge - Room #2, Week 3

Who says you don't need math?  There was a lot of math involved in this floor design.  Herringbone floors are pretty but I never gave much thought to the actual process of getting it to look pretty.  This was our inspiration and look how perfect those tiles look...now we need to get ours looking that way.

Source
You see if you don't have a perfectly square space (and who does?) then the herringbone will get all out of whack at some point in the room. To combat that we laid a border tile that was exactly square (the bead board will hide any gaps) and then began to figure out the herringbone pattern from there.


Complicated step #2 is figuring out how big the tiles should be and how to lay them in order to reduce the number of cuts and strange triangles on the end.  In our case, this meant tiles that were 3 13/16" x 7 3/4" with 1/8" tile spacers.  Got all that?


Complicated step #3 is deciding where the 1st tile should be laid and then work off that.  If that first tile isn't perfect then the entire design will get off track.  Sean drew diagonal lines from corner to corner of our square border and then worked off of that.

It is a very good thing that one of us is a turd polisher perfectionist (spoiler alert - it isn't me!).

Check out the other participants' progress here.

Friday, October 16, 2015

Two Room Challenge - Week #2, Room #2

Hi again.  Week 2 of my self-imposed Two Room Challenge (you can check out the other participants here).  Head spinning yet?  I am.  The amount of demolition dust in my house is insane slash totally normal for us.   

Today is the powder room.  A reminder of we looked like a couple weeks ago...


...and how we look today.


The overall look I'm hoping for (though maybe I'll replace the wallpaper while we're at it?  I mean, it is 8 months old after all).


We're still in a hurry up and wait stance with the plumber so in the meantime we choose tile.  I love this herringbone slate floor (coincidentally from prior One Room Challenge participant!):


Because this is a very high traffic bathroom with boys who can't aim I'm going to go with a porcelain rather than natural slate.  This is a pretty good fake (it even feels real).  We bought it in 8" x 32" tiles and we're going to cut it down to 3 13/16" (got that?) x 7 3/4"...and when I say "we"...


My brother drafted up the design so we finalize the layout before we actually started cutting the tiles.  The hard part about herringbone is that you can't just cut tiles and lay them down.  In order for the design to work out perfectly you have to take into account the grout lines.  Hence the reason for the crazy 3 13/16" measurements.


No one should be surprised I asked the husband for the most complicated tile layout I could imagine.  I'm the same person who also sweet talked him into building me a crazy complicated gable :)  I think he still likes me.

Check out the other One Room Challenge participants here.

Friday, October 9, 2015

Two Room Challenge - Week 1, Room #2

Welcome back.  If you're following along, Linda from Calling It Home is hosting the One Room Challenge and because I'm a masochist I'm making it a Two Room Challenge.  One intentional (family room) and one unintentional (1st floor powder room). 

The powder room was the unintentional renovation.  While installing a slider door in the basement we discovered mold and rotten wood from a toilet that had probably been leaking for years.  


The good news is we discovered the problem before it was a widespread mold problem and our toilet fell through the floor.


The bad news is that it meant we had to completely gut a room that we had already renovated.  Womp womp.


So down to the studs it went.  Not even a sub-floor remains.  That's the basement floor you see between the joists.


 The room looked like this the day we moved in.


Then it looked like this...


...then a little of this....


...and today it looks like this:


The plumber says the stack would probably be fine for another 10 years but because we already have the walls open we're going to replace the entire thing now.  Cha ching.


Sigh.  Money and time I hadn't planned on spending.  Plumber comes next week and then it will be time to put this room back together.  Again.

Check out the other crazies attempting the One Room Challenge!

Thursday, September 24, 2015

Good News / Bad News

I've got good news and bad news.  Good news is I'm back.  Bad news is I'm back to share a project we weren't planning on tackling.  Time and money we hadn't planned on spending.  Good news is I've never liked our powder room floor anyway.

Let me back up.  We were swapping out a rotten window and door in the basement for a big slider door.  It would eventually be the entrance to a small kitchen accessible from the pool.


When Sean pulled down the dry wall to prep for the install he found mold and rotten wood under the 1st floor powder room.  The toilet had a bad seal that leaked, probably for years.  The door installation just moved down on the to-do list and out the bathroom fixtures came.  See this floor?  Yick.  A light colored, cool tile with a warm tile inlay?  Hate it.


View from the basement, under the bathroom:


So gross.  The only thing to do was to pull up the tile, subfloor and any other pieces of moldy, rotten wood and replace it all.  Who knows when we would have eventually found it if we hadn't replaced that door.  Makes me wonder how many other lurking surprises there are.  Ignorance is bliss until you have a mold problem I guess.


As long as we were ripping out the door why not also rip out the fake bead board panels while we're at it and install real bead board (we have some left over from our porch ceiling)?  Scope creep is how we roll.


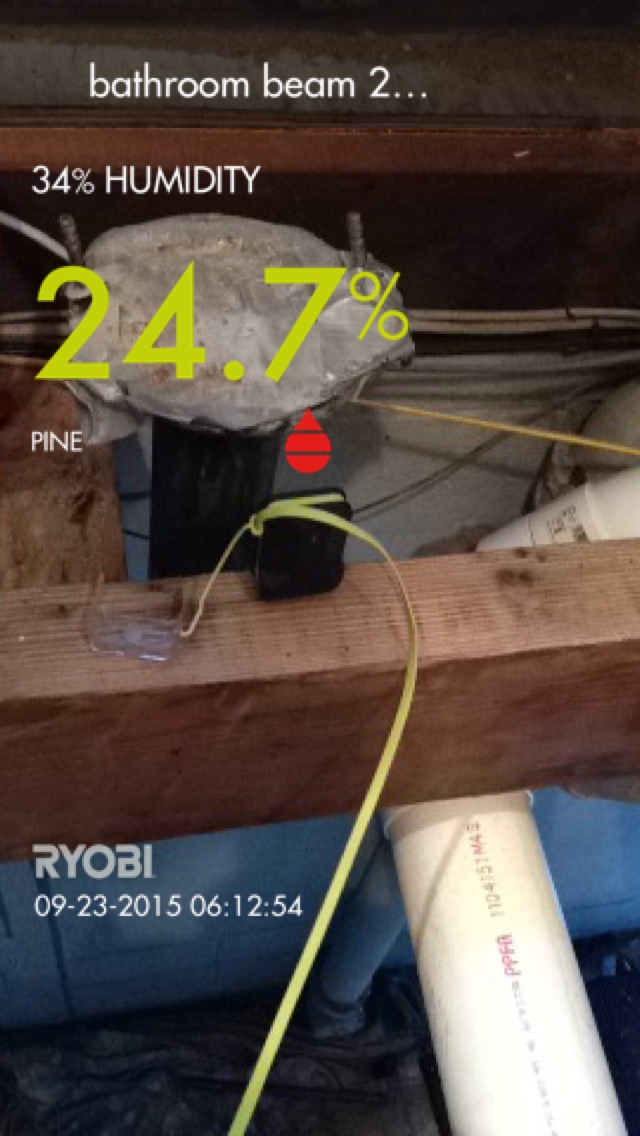
Sean bought this neat little moisture sensor from Ryobi that takes moisture readings and connects to your phone so that you can plot out changes as it dries out, etc.  After we ripped out all the bad wood we used a heater, fan and dehumidifier to dry out the wood for a couple days.


So good news is that I'm getting a new tile floor.  The bad news is the only 1st floor bathroom was out of commission at exactly the same time the 4 year old came down with a doozy of a stomach bug.  Excellent timing.  We are motivated to get this bathroom back up and running quickly.  Which meant I needed to pick a tile and it had to be in stock.

Having lived and learned with light tile and light grout in this high traffic room with little boys I knew the tile had to be very durable and easy to keep clean (or at least hide the dirt).  I love the look of slate but didn't want to deal with the maintenance of natural stone in this room.

I think I found just the thing.  This is a porcelain tile that looks and feels like slate.  In stock, not crazy expensive and both of us like it.  Done.


Now for layout.  I love this herringbone floor.

Greig Design
Somehow I actually convinced Sean that all that labor would be worth it.  I'm surprised he still likes me.  So we ordered the porcelain tile in 8"x32" tiles and will cut them down to 4"x8" subway tiles.  This is a huge gamble and may end badly.

The design will be a beast so Sean had the genius idea of having my Auto Cad pro brother plot it out so that we could decide on tile placement, determine centers, etc. and then have his engineer brother print it out on huge blotter paper.  This way we could lay the paper out on the floor, trace, cut and dry fit the entire room first.  It is sure is handy having engineers, architects and auto cad brothers in the family when you have an addiction to interior design like I do.  Or maybe they just enable me.  Either way I'm getting a herringbone floor :)

This is where our design ended up.  The bottom border row is a double row b/c the back row is actually hidden by the baseboard heater.


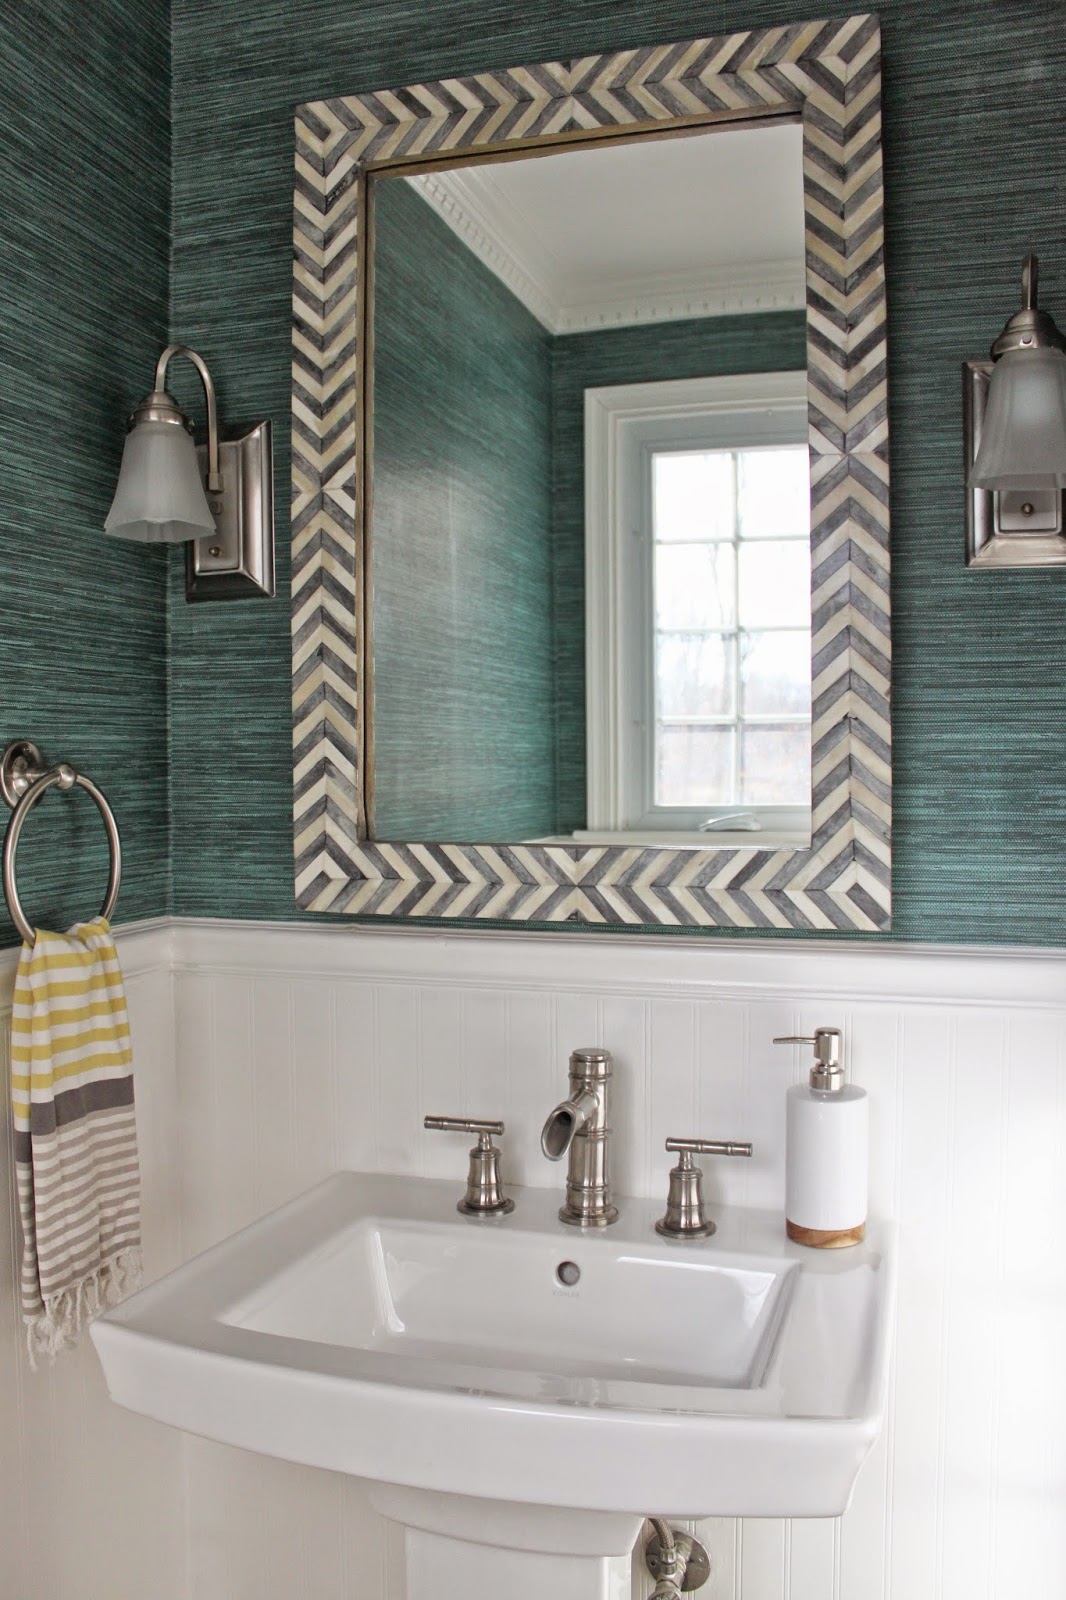
If you remember what the room looked like when we did the wallpaper install the hopeful end product will be something like this:

powder room


So now Sean is working on prepping the room for tile.  New insulation, new heating element, replace the rotten nailers and subfloor and install backer board.

The plumber just left and it turns out the stack line has seen better days.  He says it'll probably be fine for another 5-10 years but because I'm not interested in opening up the floor or walls anytime soon we'll have to bite the bullet and replace that now but can't get it done for 3 more weeks.  All that hurrying up just to wait.  Sigh.

Friday, June 12, 2015

Long time no post.  Sorry.  I've been trying to avoid house projects :)

We have a new Martin male in our household!  Meet Piper, our 7 month old rescue.


He has an insane amount of energy and eats everything in sight.  So basically he fits in with the other boys perfectly!

In other news our baby turned 4 last week.  If you're keeping track that makes a 4 year old, a 5 year old and a six year old in our house.  The puppy made perfect sense for our zoo.

We celebrated his birthday with a Monsters Inc. party.  With all the party supplies I've collected over the years I was able to pick out the purple and teal things from prior parties so I didn't have to buy much.


For some reason the boys have become anti-cupcake.  How is that even possible?  So I gave cake decorating a shot with this Sully cake.


I used store bought cake and frosting and used a decorating tip typically used to mimic grass to create the fur and my professional cake decorating sister sent me the door topper.  Piper got within an inch of eating it which meant he was an inch away from becoming a shelter doggy again (I'm kidding).  I'll keep my day job but the birthday boy loved it.


I added food coloring to 2 of the white cake layers for the surprise center.


We did finish the porch, I just haven't gotten around to writing that post yet.  Soon I promise!