Tuesday, December 31, 2013

Big Boy Room Paint

Baby boy's room is painted!  I went with the tried and true Benjamin Moore Revere Pewter that we used in our Master Bedroom.  A quick reminder of the mustard color we started with:


...and just a peak into the new color!


I'm working on a headboard so once that's done I'll post the final pics of the finished product.


Happy New Year!!!

Monday, December 30, 2013

Hamper Detour

We tend to work on multiple projects at a time so that's how I'll share them with you.  Probably feels scatterbrained to read but that's how it feels on this end.

We spent last New Year's Eve building our Ikea Pax hack closet doors so it is only fitting that I share with you the last step in that process this New Year's Eve Eve.  My favorite part of this hack was the hamper drawer.  We added a drawer front to give it a cohesive look with the doors:


You can find the steps we used to build the face here.  We backed into the drawer face design by lining up the horizontal pieces from the doors.


So there you have it!  Pretty storage :)

Sunday, December 22, 2013

Big Boy Room

Here is what I'm currently thinking.  I'm leaning toward the same Benjamin Moore Revere Pewter that I used in the master bedroom.  I'm using the existing drapes and then adding some nightstands and art from Overstock, lamps from Ikea and bedding from Pottery Barn Kids.

Evan's Room

Before I can get started though I have to do all the prep work.  Paint the window trim that I've put of painting for 4 years since the windows were replaced, repaint the baseboards and doors, fix nail pops, touch up spackle, etc.  For the trim and doors I'm going with Benjamin Moore's Decorator White.  It is a very dark room so the brighter I can make the paint the better.  While I'm at it I'll also swap out the 50 year old brass doorknobs with brushed silver to match the rest of the house and replace the outlet covers with crisp new ones.

...and we're off!

Thursday, December 19, 2013

The Before...

By the time baby boy #3 blessed us with his presence we were already full-time working parents to a 1 year old and a 2 year old and renovating our home.  We were stretched thin.  We set up his crib and called the nursery decorated.  It was a loose interpretation.  I love interior design but I've never really been one for nurseries.  They're babies for such short periods of time so I figured I'd just wait and design their rooms when they were a bit older.  So here we are.


The first things I'll tackle are to freshen up the room with new trim & door paint, swap out the brass door knob and outlet covers and then paint.  You can't tell here but the hardwood floors are in rough shape and cannot be refinished so we're considering installing wall to wall carpet.  We're hardwood floor people but we're hoping that carpet can create some noise insulation and make the bedrooms cozier.  Maybe we'll revisit hardwoods down the road. 

Monday, December 16, 2013

Little Boy Room

Having three boys in under three years has meant that we have been immersed in baby boys for the past 5 1/2 years.  We've been swimming in diapers, given over 4,300 baths, fed over 5,000 bottles and read Goodnight Moon at least two thousand times.  We made it through, oftentimes bleary eyed, by putting one foot in front of the other.  Then all of a sudden we looked up and our 'baby' was a 'kid.'

This "baby" is a spunky little guy.  When I was pregnant with him and watched the close bond the older two had I worried he would be left out.  Now I know that is impossible.  His big personality would never let that happen.  He's a 2 year old that thinks he's a 5 year old.  He squeezed himself tight into that boy pack and those three are now thick as thieves.  They are so lucky to have each other.  I am so lucky to have them. 

He is 2 1/2 and while he has no interest in leaving his big boy bed behind just yet (nor do I) I thought I'd give his room some thought in anticipation of the transition.  I'm going for a look that will grow with him.  Neutral walls, classic bedding and nothing too 'cute.'  Here are some rooms I love.

What's not to love here?  The woodwork, the lighting, the color scheme, the lighting.  The table in between the beds is just asking to be a diving board though.


The headboard, the lighting.
 

I thought about them sharing a room for about 5 minutes.  Then I realized that would be complete insanity and their constant puppy piles would extend into the late nights and early mornings.  No thank you.  Moving on.  Like the style though.


I'd like to incorporate a map somehow in the room.  I like the interesting placement in this one.

Wednesday, November 6, 2013

Week 6 - One Room Challenge Complete

This room is done('ish)!


Remember where we started?  This in 2006:


Then this just before the One Room Challenge began (boring and unfinished):


In the above picture you can see I have one long span of wall so I decided to break this wall up into 2 sections.  One half would be a leaning mirror and the other half would be a photo gallery.

I had planned on doing a post about DIY'ing an oversized, leaning mirror but after going 3 for 3 with sick kids and realizing that it would cost just as much to DIY as to buy it was a no brainer.  So here are my leaning mirror instructions - buy it.  I lived with it for a few days leaning but there was no way my boys weren't going to go crashing into it during one of their wrestling matches.  Up on the wall it went. The added perk here was that it added some visual height.


I had the same 'scrap the DIY' story on the photo gallery ledges.  I had considered building them (as I did here) but what I was looking for was available at IKEA for what it would have cost to build.  Once the ledges and the pictures were up on the wall my eye decided it wasn't right.  I think the scale was off.  See?


Regardless of the reason they had to go.  The silver (literally) lining was that I did really like the large, square frame hanging on the wall and decided that 6 of them grouped together would be the answer to fill the wall both horizontally and vertically.  Oh darn, back to IKEA.

Six 19"x19" silver frames arranged in a 2x3 pattern. Much better. You should see the swiss cheese for walls behind the frames. I have a masters in accounting but measuring throws me for a loop. I know the internet is full of strategies for easy ways to hang pictures in groupings but I didn't have the patience to research that. Squint your eyes and they're level'ish.


Interesting, woven paper backed with plain cardstock from Blick filled the frames (obviously ran out of material!).


New bedding, picking up the greens in the room:


I was going to swap out the nightstands for something mismatched and larger but never got to it so for now my IKEA Rast Hack stays.  They work well enough.


I finally finished wallpapering the backs of the bookshelf with grasscloth wallpaper.  


I filled the wall with my dresser by going shopping in my house.  Love free.  2 matching lamps and the signature matte frame from our wedding.  The price was right.


I purchased 2 canvas paintings from Overstock.  This for over the headboard:


...and this for the wall just inside the doorway.  Both are muted and pick up the colors in the room.


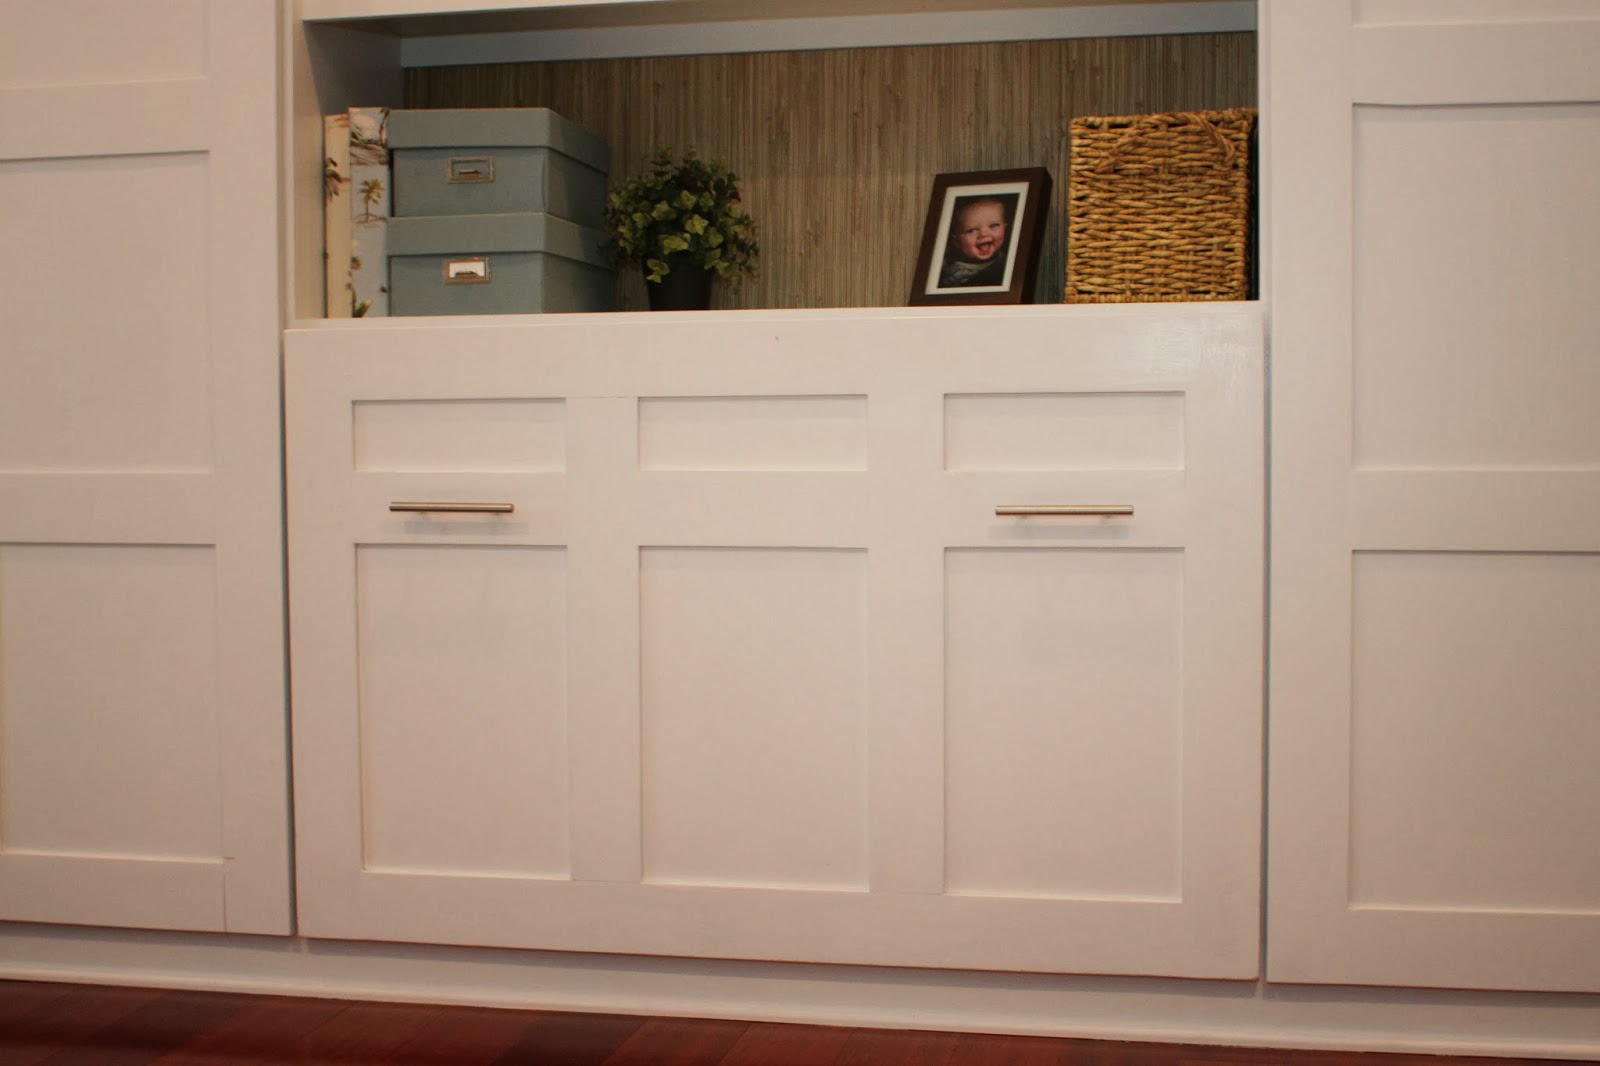
So that's it!  What I loved most about this design was that 1) it really wasn't a lot of construction and 2) I was able to reuse a lot of what I already had.  Some things I'll get to eventually are to update the nightstands and find a bench with some color but for now I'm calling this sucker done for now.  Later today or tomorrow I hope to post the updated Pax Hack hamper drawer fronts (the paint is drying!).  

Check all the great finished products over here.  Thanks to Linda for organizing this and to you for following along!  

Monday, November 4, 2013

DIY Decorative Clipboard

Death, taxes, laundry and piles of paper.  Sure things in life.

Does your kitchen look like this?  Yeah?  Well then go away, obviously we can’t be friends.
JVWHome.blogspot.com
Mine looks like this: 


Since the oldest has started Kindergarten my kitchen island has been taken over by the paper-pile monster.  Homework sheets, flyers, permission slips, art projects, bills.  You name it.  I’ve tried to organize these papers in baskets but then they overflow and I get more baskets and then the paper-pile monster is eaten by basket monsters.


I bought 4 clipboards for a dollar each at Amazon and 12”x12” decorative paper at Blick.  Grand total for all materials for 4 clipboards is under $10.  Warning if you choose to turn this post into a drinking game and drink every time you read the word ‘clip’ you’ll be wasted by the end. 


I traced and cut the paper using the clip board as my template.  Using a chip-clip I clipped the clipboard (say that 10 times fast) so it was in the open position.  Then I painted on a coat of Modge-Podge and carefully laid the paper over it, smoothing out the wrinkles.  I topped it with 2 coats of Modge-Podge to seal it and let it dry overnight. 

They're hanging above the hooks for the kids' backpacks.  Paper gets unloaded from their backpacks and are either trashed or clipped to each kid's board. 


That’s it.  It is that simple and pretty impossible to screw up.  Now each kid has a clip{take a drink}board to hold their school papers and I have a clean(er) island!

Thursday, October 31, 2013

Week 5 (Part 2) of the One Room Challenge

More ORC posts this week.  Check out the grasscloth post from earlier this week here.

The husband is now getting in the ORC spirit.  Remember our hamper drawer from our IKEA Pax hack?  Well the plan was always to cover it with a fake door front. We get a lot of requests for a 'how to' on building the doors so I'll use the build of this door to show the general concept.  You would need to adjust the plans depending on your size/design needs.  It takes a LOT of patience and precise measuring. I don't have either of those skills so this was a project for the engineer husband.

You could probably just use a flat sheet of wood and glue/nail the wood stiles right on top of it but if you're building a large door it would be prone to warping.  Our doors are tongue and groove so that all the pieces fit together like a puzzle.  This allows for expansion and contractions across the seasons which minimizes warping.  Here was our plan:


We used 1x4" birch boards and 1/4" sheets of finished plywood to build our doors.  The wood sat inside for a week or so to acclimate to the house.  Using a 1/4" router bit Sean put the grooves in the wood.  This is what the wood sheets will slide into.


That became this:


Once all the pieces were cut he dry fit it against the hamper drawer to see that it completely covered the drawer and while ensuring the doors on either side still opened.  You can see how the pieces slide together here.


We used the very scientific approach of using a level and a Dinosaur Dig book to determine spacing off the floor to line up against the already installed doors.


There were many helping hands.


Before you glue, as you're assembling, stick a small square of window insulation at each corner of the plywood sheets.  The insulation will give the wood freedom to expand and contract without the wood rattling around as it is moved.  Next up, glue.  Run a bead of wood glue on the rails and stiles only.  Important - do NOT glue the plywood.  That should remain floating to allow the wood to expand and contract with the seasons.  Wipe up any glue drips quickly.  Clamp tight and then let dry for 24 hours on a flat surface.


Next up - sanding, prime & paint! Lightly sand for smooth finish.  1 coat of primer and 2 coats of paint.  We used Benjamin Moore Decorators White.

Head over to Calling It Home to see the progress of the other participants!

Tuesday, October 29, 2013

Week 5 (Part 1) of the One Room Challenge

Week 5 - one week left!  Check out prior weeks here.  I was humming along nicely until week 5 when we decided to start 3 new projects on the room.  Awesomesauce.  I'll break this week into a couple posts.  First up, grasscloth wallpaper.

I've always had a thing for grasscloth wallpaper.  I love the natural colors, the texture...heck I even love the seams.  With designs like these who wouldn't?

Source

Caccoma Interiors

Markham Roberts
Source
Before I decided to paint the room I had considered grasscloth wallpaper.  I ultimately decided against it because I have been dodging the wallpaper gods for 30 years now.  You see when I was little my design guru mother spent an exhausting day wallpapering my room.  Not 24 hours later my brother and I decided it would be a good idea to rip all of said wall paper off the walls.  If she didn't give us up for adoption that day I knew she never would.  So you see the wallpaper gods have been waiting to exact their revenge on me ever since.  

That is how I ended up with painted walls.  My mom, forgiving me for my wallpaper destruction, found a roll of grasscloth wallpaper in an odds and ends bin at the wallpaper store and picked it up for me.  Perfect for a small project like adding some interest to the backs of our bedroom bookshelves.

I have a very short attention span so a year from now odds are good that I will want a new look for my shelves so I decided the apply the wallpaper to wood panels that I could change them out.  We had some leftover wood in the garage so the husband cut them down to size.  I had considered priming them and using wallpaper adhesive like it should be installed but decided to take a short cut and just used Modge Podge.  It worked out fine.  Ta-da...and then I ran out of wood so I'll finish the rest up by week 6.


Hmmmm, what could be that wood thing just below the shelf you ask?  That's the husband's latest project that I'll get into in another post :)

Head on over to Calling It Home to see the progress of the other participants! 

Wednesday, October 16, 2013

Week 4 of the One Room Challenge

Week 4 of the 6 Week challenge (check out prior weeks here).

Now it starts getting fun.  Construction is behind us.  This week - drapes and rugs!

I bought the original drapes for this room not long after we laid the hardwood floors a couple years back.  Allesandro panels from Pottery Barn. 

Pottery Barn
I mentioned that I never finalized a paint color because I’d been trying to coordinate with these drapes.  I like them, I really do, but finding a coordinating paint color was damn near impossible.  Then in the middle of the night (literally, I’m crazy like that) the solution came to me.  Remember those silk drapes from my living room that I replaced because at 84” they were too wimpy for the room?  


Well 84” drapes in an 89” ceiling room with 3.5" crown moldings are perfect and the color was way easier to coordinate! They're a similar green but reads much differently in the absence of the yellow.  You can’t beat free!


Now onto the floors...
Life with 2, 3 and 5 year old boys means waking up in the morning is like drinking from a fire hose.  It is zero to sixty in 3 seconds.  I don’t know how they do it but kids wake up bursting with energy and noise.  So for the floors I wanted something cushy on my feet when I get out of bed to make my mornings just a little more pleasant.  The Pottery Barn Hudson shag rug fit the bill. It looks more yellow in this picture than it actually is.  It is off-white in real life.

Pottery Barn
Because the room is large I decided on two 5x8 rugs as opposed to one large rug that would be mostly covered by the bed.  I hemmed and hawed on the price but ended up going for it because I’ve always had really good luck with Pottery Barn rugs.  I traded in my credit card points for gift cards, sold my broken, unused iPhone and linked the purchase to my kids' Upromise account so Pottery Barn deposited 5% of my purchase into their 529 college savings accounts.  You’re welcome kids.  See how I just did that?  Rationalized it down to me thinking it was basically free…when I reality it was not J


Doesn't it look like a mat of mini-marshmallows?  Seriously it feels that way too.


Current review – I’m a big fan (as is the dog).  It is so plush I have been known to face plant on it at the end of the day.  My boys use it as football turf (each rug being a different end zone).  It sheds like a mother but that should stop eventually.

Check out the progress of the other participants here.