Monday, February 1, 2016

Foyer Complete

After wrestling 3 boys into and out of snow suits a dozen times a day for the past few days thanks to the Bizzard of 2016 it became even more apparent that I needed better storage just inside the door.  Balaclavas always demand ninja stances.


A reminder of what we were starting with.  A very dark entrance with zero storage, an ugly baseboard heater and an uglier floor.


Voila! Solving 3 out of 4 problems isn't bad (the floor remains).


Eventually we'd like to add a shelf up top to hold baskets.  

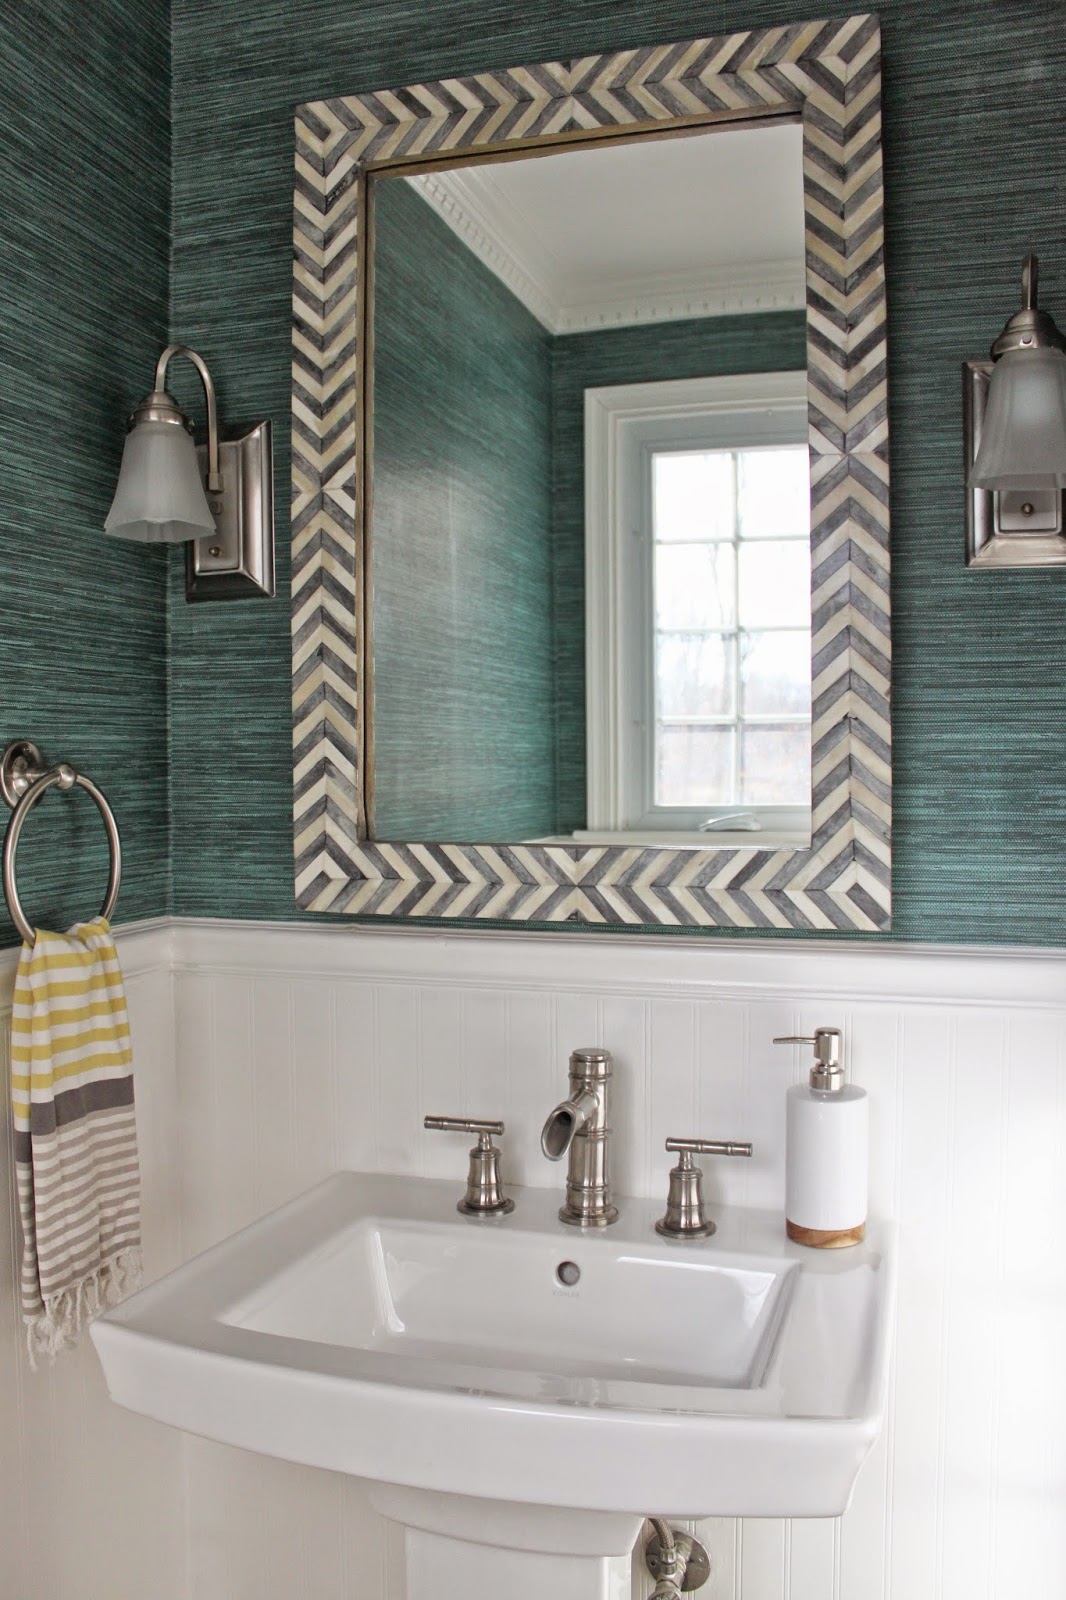
Remember that mirror from our powder room?  Well I decided to place it adjacent to the door to reflect the light into the dark foyer.  Mission accomplished.  I added 2 sets of hooks.  The upper to hold hats, the dog's leash, etc. and the lower to hold the boys' coats, sweatshirts, etc. with enough headroom for my tall husband.


Baskets and bins below to hold mittens, hats, etc. in the winter and baseball gloves and sunscreen in the summer.


I can't figure out the wall color.  It has been 3 different colors in 8 years and I've tried countless samples.  It is currently Benjamin Moore Edgecomb Gray which works in basically every scenario except this one.  It is reading pretty green.  Its ok for now.

I think I "need" to paint the interior side of the front door.  I love a black front door but I'm wondering if painting it a lighter color may also help lighten up the space?  What do you think?  Also I think I eventually "need" to cover that ugly floor with a sisal carpet tile.  Agree?


So that's a wrap for now.  Maybe some tweaks down the line.  It already provides some much needed interest and storage to a previously unused space.

Thursday, January 28, 2016

Floating Bench

Last time I mentioned that I liked the idea of a floating bench or ledge to maintain some visual real estate.  I love all of these:

source

source

source
So step one in my project was to figure out the bench situation.

Then why am I showing you a picture of my kitchen when we moved in?  See that butcher block counter top on the island?  We saved that and it has been sitting in our basement for the past 8 years.


Sean and I ripped a piece down to the size we needed to fit the area.


I dry fit the wood into place using my porch garden stools.  Good fit and height.


There was some leftover crayon, stickers, etc. from the prior owners so I sanded everything smooth using an orbital sander.

Then my 5 year old and I conditioned, stained and poly'ed the wood.  I used 4 coats of poly because I imagine that bench is going to see a lot of use.


I used Minwax Special Walnut.  I wanted a brown color without hiding the grain.


Once we finished staining and poly'ing we had to figure out how to mount it.  It is a solid 1.5" thick which means the bench is probably 80 lbs.  Figuring out to mount a piece that heavy (that also has to hold a person) and be floating was challenging.  While not a perfect solution we decided to mount them using these brackets (affiliate) which hold 1,000 lbs:

2 brackets were mounted into the studs.  My stud installing them into the studs.


You can see they are a little visible but once boots, baskets, etc. are placed under the bench they really do disappear.  


Side note, how ugly is that floor?  It is sitting in 2" of concrete so while we've pulled most of it out of the house this small section remains.   For as ugly as it is, it really does hold up well against the snow and salt.  Does anyone know if I can tile right over it?  It is about 1/2" lower than the hardwood that meets it and is in solid condition.


Now that the floating bench is complete, time to move on to the wall storage above it!


Monday, January 25, 2016

Foyer

Mudrooms are the things my dreams are made of.  I've thought long and hard about how I could create one but based on the way my house is configured it is impossible.  We're being overrun with kid coats, sweatshirts, hats, gloves, sporting equipment, etc.  While we can't have a mudroom there are still some spaces that could be put to better use.

Enter the foyer.  I really didn't take any before pics - sorry.  This is the best I could find on my hard drive.  See that itty bitty 16" deep space just inside the front door?  That's what I decided could work a little harder.


I want to turn that 16" narrow span next to the front door into storage area.  These are my inspiration:

I like the floating console table to keep the space visually open.  That would be key for my narrow space.  Don't even get me started on all that natural light.

source
Hooks and a bench and best of all it looks like they're hiding a baseboard heater just like we have.  But come on.  Look at that staging.  A basket of wildflowers and a few scarves?  Show me a basket of baseball gloves and a few jock straps and I'll show you reality.

BHG.com
So cute.  I'll have to remember this for summer pool storage this summer.

marthastewart.com
So the goal is to transform the unused foyer into a more interesting space with better storage.  Oh and I don't want to spend a lot.  Famous last words.

Thursday, January 14, 2016

2015 Year In Review

It was a relatively slow renovation year for us.  Only a few big projects.  I'm hopeful that our renovations are slowing down.  Who am I kidding - we're just saving our pennies to tackle the outside.  This post will be a quick walk down memory lane.  One of the rooms in this post was renovated twice this year.  

First up was the powder room.  What started the year with bold stripes...


Then what was going to be a fresh paint job...


Then to properly bookend the year we were forced to gut our newly redecorated powder room and turn this gross floor...


...into this beauty!


I know I still haven't shown you the family room.  I need to figure out the walls.  Hopefully in the next couple weeks.

2016 is gearing up to be the year of the outdoor space.  Hopefully we can make some decisions and share something soon!

Monday, December 21, 2015

DIY Canvas Frame

I built a frame.  All by myself.  Power tools and all.  I don't need a man (finger snaps).  Scratch that, yes I do.


I have this print that I bought on Overstock.com.  I really like it but it looked unfinished.


So I searched for a frame but because it is 2" thick and an odd size I couldn't find one for less than $100.  The art was really cheap (and I'm really cheap about some things) so I wasn't interested in paying that.  It is 4 pieces of wood - how hard could it be?  Off to Home Depot I went and picked up these oak craft boards (2" x 1/2").  $20.  I'm sure I could have figured out a way to pay less but I had about 10 minutes before I had to get the kids off the bus so I was in a hurry and grabbed the first thing that worked.  I could have butted the corners and it would have looked fine but I mitered the corners.


Then I conditioned the wood.  Don't skip this step - it is super important to help the wood accept the stain.  I've been using this same can of pre-stain for about 8 years and as long a it doesn't dry out I'll have it for the rest of my life.  Then I stained it using Minwax dark walnut that I've used on every project I've stained in this house.  Wear gloves.  I didn't and my fingers are still brown.


After letting the wood conditioner sink in for 15 minutes I applied one coat of stain and got the color I was after.  If you want to go darker you can continue to add layers.  If you want to go lighter you can wipe off the stain quickly after you apply it.  And yes that is a silk shantung drape I'm using as a drop cloth.  As the most interesting man in the world says, "I don't always DIY canvas frames but when I do I use silk drop cloths."


Then I assembled the frame by applying a bead of gorilla glue (just a dab will do ya or it'll ooze out the sides) and then clamping to dry for about an hour.


Just for added security I added a staple to the corners.


Then add a screw from the inside of the canvas frame to the finished frame itself.


My goal of coordinating the mirror frame to the art was achieved. 


Not perfect but the $20 price tag was way better.


Tuesday, December 8, 2015

DIY Cyanoptype Prints

Remember when I showed you the overall idea for the family room?  It originally had those blue prints behind the couch.


Well Pottery Barn has them for $509 for a group of 4.  $509!?  Um, no.  
Pottery Barn
Mom to the rescue.  She created 7 of them for me using an old printing process called Cyanotype.  You can get 15 sheets of the specialty papers for under $10.  My accounting degree tells me $10 is much better than $509.

Materials:
Sun sensitive paper (affiliate link)
- Leaves, flowers, etc...whatever you want to make an image of
- A bowl of water

Process:

1) Lay out a piece of the sun sensitive paper and place the object on the paper.  If it is windy you can lay a sheet of glass over the object.
3) Place it in the sun.  You can adjust how white or blue the image ends up being by the amount of time you leave it in the sun.
4) After the image sits in the sun, quickly place the paper in water for a minute.  This will stop the development process.
5) Remove the paper from the water and let them dry.  
6) The ends will probably curl so after they're dry place heavy books over them to flatten them out.

Admit it.  You kinda want my mom to adopt you.  I get it.

The original plan was to place them over the couch to pull through some more blue into the room but when I taped up some prototypes I couldn't get the layout right.  2 rows of 3 was too short and 6 or 7 across was too long.  I'm glad I used paper and tape before I started putting holes in the wall.  Thank you Amazon Prime and all the packing paper you send me.


I ended up finding the perfect place for all 7 prints above the wainscoting we did earlier this year.  I love the contrast, repetition and how it pulls the clean lines from the wainscoting up onto the walls.  


Tip for hanging pictures correctly the first time: Put a level up on the wall to get your top point and draw a line.  Then put a dot of toothpaste on the picture hanging hardware on the back of the picture.  Line the top of the frame up against your level line and push the picture against the wall.  It'll leave behind a dot of toothpaste where you can hammer in your nail and leave your walls smelling minty fresh.


What I love about these prints that the $509 Pottery Barn prints could never give me is the sentimental value.  They were made by my parents using nature found in their yard.  Take that Pottery Barn!

Friday, December 4, 2015

Powder Room Reveal

Finally this room is DONE!  I knew it was a hard working room but man was that 3x5' space missed!


A quick reminder of where we started when we bought the house:


Then it looked like this (briefly) before we discovered water damage. 


Today it looks like this!
                            

Bright and timeless (I hope because I don't want to do this again anytime soon).


Who doesn't love a herringbone floor?  See how the design features all full sized tiles end to end?  That took a ton of math and tile cutting.  I'd recommend not doing that again :)
                         
We replaced the other toilet with one a bit more standard.  The other, while the prior homeowners spent about three times what I would have spent on a toilet, was an odd size.  Disappointingly this one does not clean the pee from poor boy aim on the seat as I would have hoped.


The mirror was sourced at HomeGoods by my personal shopper (thanks Mom) and I think does a nice job of stretching out the narrow room a bit.  We swapped the sconces for one overhead light.  The best part about the room isn't something anyone else would notice but we replaced the awful drywall, builders grade molding and the and the ceiling.  It all looks so clean now.


And for good measure - one last look at that pretty floor :)                                And because when it rains it pours I'm awaiting my new couch delivery any minute!  My kids told me yesterday that there were 23 wake ups until Christmas and 1 wakeup until couch delivery day.  There is no denying they're my children :)