Baby boy isn't interested in leaving baby jail his crib just yet which is fine with us but I'm getting his big boy ready for him for when he is.
The goal = upholstered headboard that attaches to the existing frame. I've made upholstered headboards in the past that hang on the wall but I don't love that installation method because when leaning up against the wall to read to them at night the bed frame pushes away from the wall. The Internet is full of tutorials on upholstered headboards but not a lot on versions with legs that attach to the frame so I'll show you how I did it.
Materials:
- x2 2x4's
- Stain
- Wood conditioner
- Poly protective coat.
- Plywood or MDF (or really any flat piece of wood...I've used an existing headboard and a door for past projects and they worked out fine).
- Fabric (I chose a solid navy duck cloth)
- Batting
- Foam or egg crate (I used Nu Foam - a mat of polyester fill, a urethane free substitute for regular green upholstery foam. Either will work)
Step 1: Stain the bottom portion of the legs that will be visible. Apply the conditioner (to ensure an even finish) and wait 15 minutes for it to soak in. If I didn't already have any on hand I probably would have skipped this step. Apply as many coats of stain as you need to get the color you desire. I only did one coat. It is for under a bed, let's not get crazy. I sealed with with a coat of SafeCoat Poly.
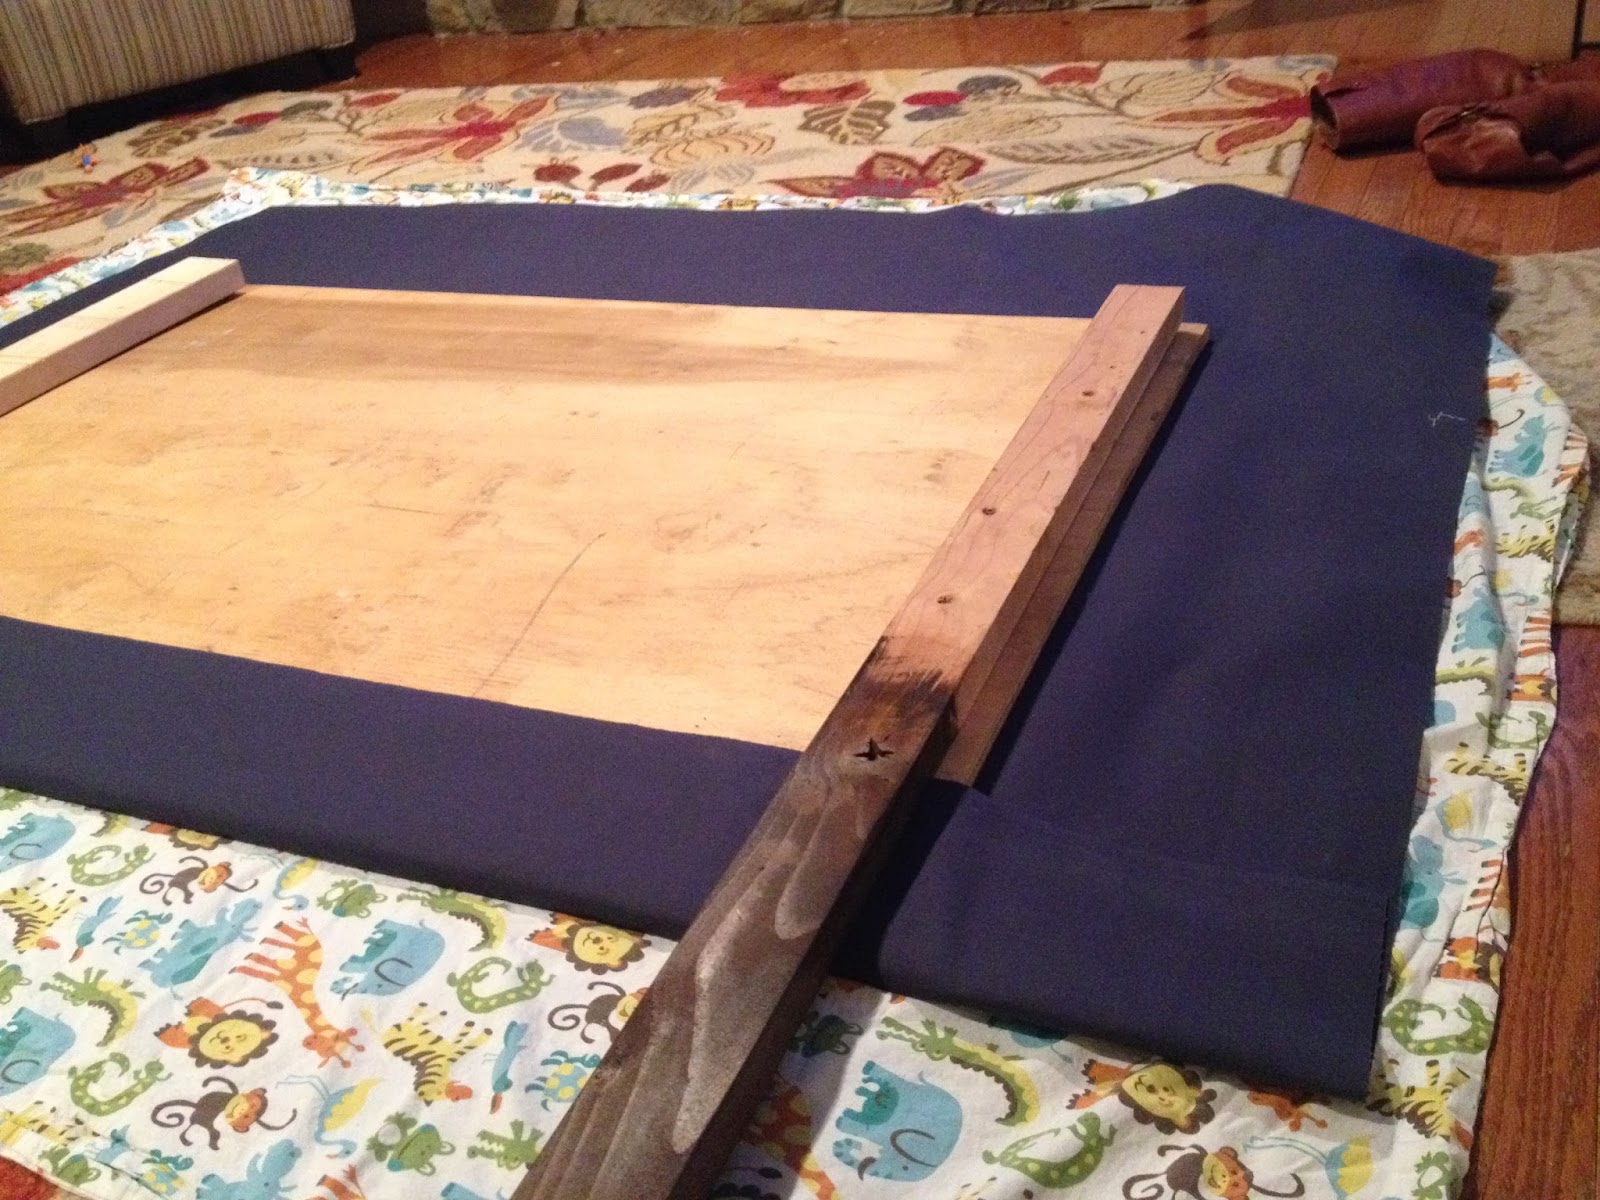
Step 2: After the legs dry you'll need to attach them to your plywood or MDF. This part was a little confusing to me because I wanted to ensure the bottom raw edge of the plywood was covered but also wanted to wrap the entire unstained portion of the 2x4's with fabric. First I laid down a clean sheet to protect the fabric. Then I laid the fabric down flat and the plywood/MDF on top of that. I folded the bottom portion of the fabric up over the MDF/Plywood. Then I laid the legs on top of the fabric. I measured the distance I'd need the 2x4's to be by measuring the bed frame width. The 2x4's were then placed and attached using screws big enough to grab both the 2x4 but not so big that it would come through the other side.


Step 3: Now that the legs are attached and the bottom raw edge of the plywood/MDF is covered it is time to upholster.
- Leaving the fabric on the floor flip the plywood/MDF part of the bed back over so they're separate.
- Lay the batting down on the fabric, then lay the foam/fill over the batting.
- Flip the plywood/MDF back over so that it is laying on top of the batting and foam.
- Pulling as tight as you can staple the foam and batting to the back of the bed.
- Once that is all secured pull the fabric over the foam and batting and staple that to the back. I made sure that the fabric covered the 2x4's entirely so that nothing was exposed at a side angle.
Following these directions I was able to ensure the 2x4's were completely covered from side angles.

This shot shows the legs that the frame will attach to. It isn't yet attached because we're currently shopping for wall to wall carpet and would have to detach it in a few weeks anyway but it'll attach with some screws.


And let's hear it for the $1.50 shams I found at Ikea!

That's it! I may add some bronze nail heads but I'm worried about my ability to install them straight. What do you think? Nail heads or leave well enough alone?
A DIY upholstered headboard is a fantastic way to add a touch of luxury and personality to your bedroom. Choosing the right fabric, padding, and design can elevate the aesthetics while ensuring comfort. Whether you opt for tufted elegance or a sleek modern look, the customization possibilities are endless. If you're looking for stylish and space-saving bed options, Wooden Street offers a wide range of beds with elegant headboard designs. Their collection blends functionality with aesthetics, making it easy to achieve a designer bedroom look. A well-crafted Upholstered bed with headboard not only enhances comfort but also transforms your space beautifully!
ReplyDelete