Tuesday, December 30, 2014

Powder Room

So as long as I'm resealing the tile I may as well redecorate the entire room right?  This room has only been four different colors in six years so it is screaming for a refresh.

I'm finally getting my grasscloth wallpaper.  Kind of.  Faux.  The room couldn't be any smaller than it currently is and half the wall is covered in bead board so it will not require much paper.  I've chosen this dark teal grasscloth from spoonflower.  A bit of a gamble ordering paper online that I've never seen in person but life's short right?

The bead board, sink, lights and fixtures are already in the room so it is really a wall paper and accessories refresh.  Here we go again!

powder room

Friday, December 26, 2014

Popcorn Crack

I mentioned this ridiculously amazing popcorn recipe in my post on cookie decorating.  You're welcome and I'm sorry.

Yield: 3 gallon sized freezer bags full

Ingredients:
3 bags microwave popcorn
24oz white chocolate chips
3 tablespoons of peanut butter
3 cups of Rice Krispy cereal
2 cups of peanuts 

  • Pop the microwave popcorn.
  • Microwave half of the white chocolate chips and half of the peanut butter until melted (stopping periodically to mix).  Then repeat the melting for the remaining chocolate chips and peanut butter.
  • Mix Rice Krispy's and peanuts into a large bowl (the biggest container you can find...a 5 gallon bucket isn't too big!).
  • Add one bag of popped popcorn (you may want to take out any seeds prior to combining.
  • Pour in about 1/3 melted chip/peanut butter mixture over the popcorn mixture.  Mix with spatula.
  • Continue adding popcorn and melted chips/peanut butter mixture until gone.
  • Dump contents of the bowl onto wax paper--spreading in clumps.L
  • Let mixture harden before putting it into a container

Tuesday, December 23, 2014

Cookie Decorating Party

Yesterday we invited some neighborhood families over for some cookie decorating in advance of Santa's arrival.  

We kept the afternoon party menu simple with popcorn (I'll share an amazing recipe in a future post), cheese & crackers, carrots & hummus and hot cocoa & marshmallows. 


I baked a few dozen cookies in advance, stuck them in the freezer and then thawed them the day before.  I made frosting using confectioner sugar, butter and almond extract and then filled condiment bottles with frosting (affiliate link).  I put the sprinkles, sugar and candies in cupcake wrappers so that there were no lines waiting for the sprinkles.  


I wrote each kid's name on a paper plate so we could keep track of each creation.  Ultimately it ended up being sprinkles and sugar with a little bit of cookie.  Some of the cookies were very 3D with the amount of sugar piled on them!


As long as we were loading it up with sugar why not shoot the moon and add whipped cream?


Probably the smartest thing I did was to snag a dozen bakery boxes from the grocery story to send the kids home with their creations.


With 15 kids under the age of 10 and a mountain of sprinkles I'm pretty sure I'll be finding Christmas sprinkles at Easter.  All in all the party was a blast.  Good friends and good treats - what more can you ask for this time of year?

Happy Holidays!

Sunday, December 21, 2014

Crock Pot Hot Chocolate


Ingredients:
1 can 14 oz sweetened condensed milk
1 1/2 cups heavy whipping cream
8 cups milk
1 1/2 tsp vanilla extract
2 cups semi-sweet chocolate chips 


Directions:
  • Combine milk, sweetened condensed milk, whipping cream and vanilla extract in crock pot and quickly stir. 
  • Add chocolate chips to crock pot and mix
  • Cover and heat on low setting for 2 hours. Stir occasionally.  After chocolate is fully melted, reduce to 'warm' setting.
  • Serve and top with marshmallows.

Let the sugar high begin...


Saturday, December 20, 2014

Light

Now that the barrel ceiling is nearing the finish line (still need to add the finishing trim, caulk and paint) it was time to add the jewlery - a pendant light!  We initially went with this classic black pendant.  It is OK.  That's it, OK.  Ok is fine, it would have worked, but we worked so hard on this porch that I felt we earned awesome.  


Remember how I was coveting this copper and iron light?  Well we ended up using my spray painted, cheapo version for the sconces since we really don't use them.  Sean reminded me of this light, from the same collection, that I have been in love with for a while.  I reminded him that it was twice the price but he said to go ahead and get it (who IS he?!).  Thanks to a 20% off coupon I ended up getting it for not much more than the builders grade light we currently had.  This one is beautiful, constructed of copper and iron.  Art.


My hesitation was the scale.  It is huge.  10" taller than the existing pendant.


Thankfully, it is perfect!  The barrel is massive so it really fills the space beautifully.  Here it is during the day...


...and at night.


Love, love, love this light.  The never ending project is slooooowly getting finished.  The last steps are the column wraps, caulk and paint.  Unfortunately each of those things requires a series of 50 degree days which I'm not sure we'll get until spring.  In the meantime you'll find me ogling my new light. 


Tuesday, November 25, 2014

Wainscoting Trim and Holiday Trimmings

What up.  Been a while.  We tend to get 95% complete with a project and then stall.  We have some final trim pieces to install and the column wraps but we're kind of dragging our feet on that until we make a final decision on what to do with the floor.  If we replace the floor the porch will need to be jacked up and the floor jacked out.  That would destroy the column wraps and at over $100 per we want to do it once.

The other hurdle is that you cannot use PVC glue, caulk, putty or paint when the temperature dips below 50 degrees.  Considering we're expecting our first snow storm of the season tomorrow the final touches may have to wait until spring.

In the meantime Sean started working on the wainscoting trim for the gable inlay.   There will be some additional layered pieces but we're trying to get the design right first.  What you see below isn't even nailed in yet.


I had been eyeing these wreaths and garland from Pottery Barn.  I liked the the color the ornaments gave to the greenery.  At $70 for the garland, and $40 and $70 for the small and large wreaths I was looking at ~$300 to do my house.


So instead I bought 2 boxes of ornaments from Ikea for $8 each and wired up the old garland and wreaths we already had.  For something I'll use for 1 month out of the year I'll take my $16 decorations over $300 any day.


 Happy Thanksgiving!

Wednesday, October 29, 2014

Last night I power washed the porch for the first time in probably 50 years.  Literally.  See how dirty it was?  I thought gray/brown was the actual color and was just hoping to clean it up.


Buuuuuut unfortunately it turns out the floor is super ugly under all that dirt.  Note to self: next time you build a porch determine if you need a new floor first.


When we first moved in the interior floor actually looked like this as well so I probably shouldn't have been surprised.


The good news is that our windows look really shiny and bright!


I'm hoping that I can finish putty'ing and caulking tonight so that tomorrow can be a painting day.  We shall see!

Monday, October 27, 2014

Crowning Achievement

We're getting there!

We had ordered a bunch of brick mould and cove moulding to trim out the edges of the bead board ceiling but it didn't look right and would have been extra work because it required routing out the back.   The more I thought about it classic crown moulding was a better option.  I hated to waste the expensive material we already had but we've already spent so much time and money so it was the right call and saved us a ton of time.


The crown is made of the same PVC material as the rest of the trim.  We used the Kreg Crown Pro tool which I love.  Saves us so much time and money each time.  We were able to get the 2 sides of the shed portion to the sides of the gable done in a couple hours.


The gable portion was much tougher and we have no idea why.  This part took us 3x as long and we ended up wasting a bunch of expensive material.  Ouch.


Finally the underside of the porch is heading into the home stretch.  The only portions left are the trim above the door and the columns wraps...


...oh and filling holes, caulking, sanding and painting until Easter!

Monday, October 20, 2014

Bead Board

We declared last weekend, "get 'er done" weekend.  Goal: No scaffolding by Sunday.

Remember where we started.  Tired...


 ...and not exactly safe.


So we pulled it down and rebuilt the shed portion to the right of the front door...


...and to the left.


Cut out the middle and built a barrel ceiling gable.


Then we ordered about a mile of PVC trim.


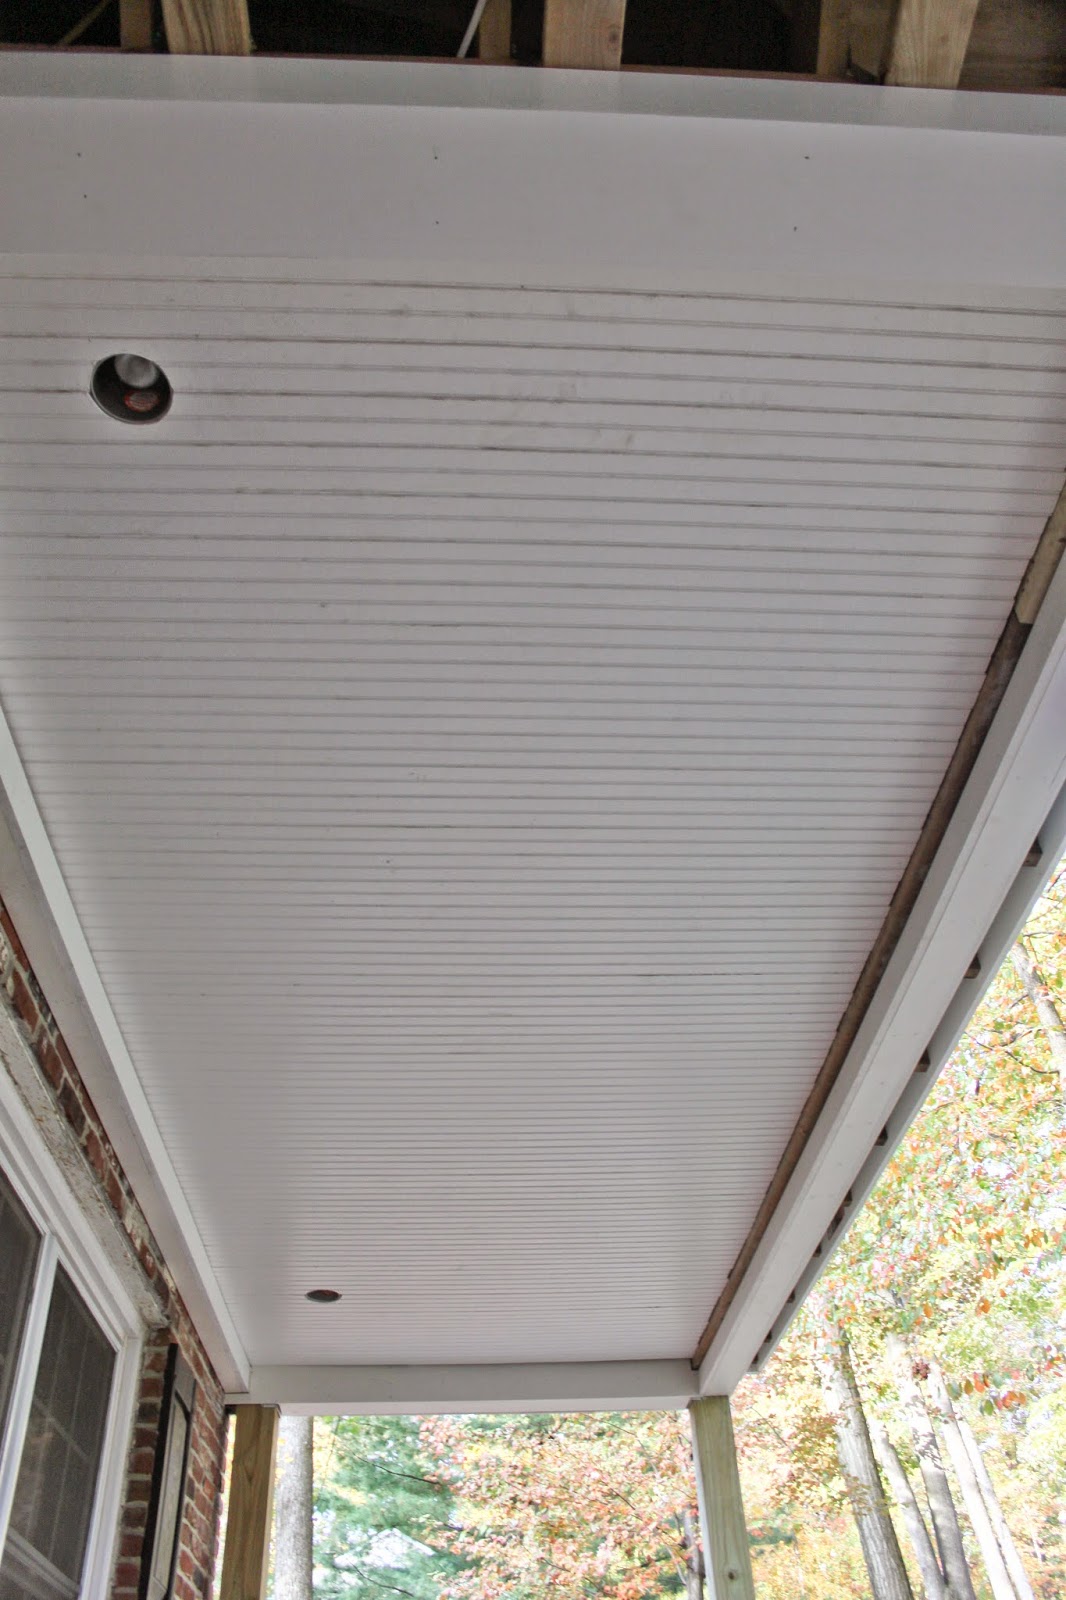
And we slowly nailed up 142 bead board planks.  Literally 142.


Ignore the rough edges and the dirt.  They'll be finished with...something...haven't exactly agreed on what just yet.  Then putty, caulk and paint will make it all look seamless and clean.


To cover the headers that support the gable we got clever and wrapped it with column wraps.


The columns wraps are pre-made and mitered perfectly.  They come with the corners all taped so you apply the glue to the inside, close around your wood supports and then after the glue dries, peel off the tape for a perfect edge.  We could have wrapped it with PVC boards and saved a little money but because it is in such a visually prominent place we wanted the edges perfect.  Success!


Installation on the shed portion of the ceiling flew and was completed in a day but the quick work came to as screeching halt when we had to meet the flat ceiling to the barrel.


We had to cut two planks at odd angels to get both the barrel and the flat ceiling portions to exactly meet. Ours was a tricky 132 degrees and because the saw doesn't cut that angle there was a lot of creative maneuvers.  I won't even try to explain it (because I literally can't - Sean's the math guy).  They couldn't be more than a degree or two off without screwing up the rest of the ceiling.


We cut it (punny) close but we met our goal.  Sunday night and the scaffolding is gone!


Tuesday, October 7, 2014

A Roof Over Our Heads

You'll remember our porch started here.  Fine but the house had a pretty boring roof line with the porch extending directly into the garage.  No opposing angles or interest.


So we did this:


...and then this:


A little of this:


Followed by this: 


Until we got this:


The metal roof is done!  I'm breathing a huge sigh of relief.  I really like how it turned out.  Ignore the ugly asphalt seam.  The original plan was to tooth in the old shingles with the new but it turns out that the old shingles were crumbling as the roofers tried to do so so these shingles will serve as a temporary solution until we can replace the entire roof next year.  My wallet needs a break.


Each step now has a very visual reward which really helps our fried brains.  Next up is the decorative wainscoting that will go in the inlay above the metal base in the triangle, bead board ceiling and miles and miles of trim. 

Monday, October 6, 2014

Raise the Roof

Finally after 5 weeks of waiting the roofers began installing our custom standing seam, black metal roof!  I've been sweating bullets since I first handed over the deposit check wondering how it would look, hoping it didn't look like a strange add on.

Thankfully I love how it is looking.  They still need to add the ridge cap, install the inlay (on that plywood section in the base of the triangle) and then patch in the shingles but so far I'm loving it.  Ignore the fact that the lawn is severely neglected, the gutters are a joke and basically everything is a mess.  Squint your eyes and focus on the pretty metal.  


You'll notice we also started the trim work.  We spent at least a month measuring, re-measuring, coming up with a supply list (so many different sizes needed) and then price shopping this trim so I was relieved when a massive shipment of PVC trim was delivered last week.  We decided to go with the much more expensive PVC option because I like to spend money once this sucker is finally done we have no interest in ever redoing it or repairing rotting wood.  


The trim looks pretty rough right now but once all the pieces are layered and the trim cap pieces are installed it'll look seamless (I hope anyway). 


We covered all the headers.


...and cut the large sheets for each of the 3 inlays (semi-circle above the door, triangle above the exterior gable and the semi circle on the other side of the gable).  These were expensive sheets and I was pretty sure we'd be buying more with at least one bad cut but it looks like we managed to not screw them up. 


We still have miles and miles of trim to install but at least now everything we do will have a visual reward.  Does anyone know how to fill seams on PVC for the exterior (I'm painting it)?  Nail holes I'm good with but I can't figure out the seams...